Friday, September 4, 2020

How to make a chair out of wire, recycled iron, and a sheep skin

 How to make a sheep-skin chair from yard sale finds


Crone Crafts by the Mother of Invention


Found these two green iron side-arms from an old wooden lawn bench for $15.

My first order of business was to paint those side iron frame red (to match my place). I used a spray can meant for painting heavy machinery.

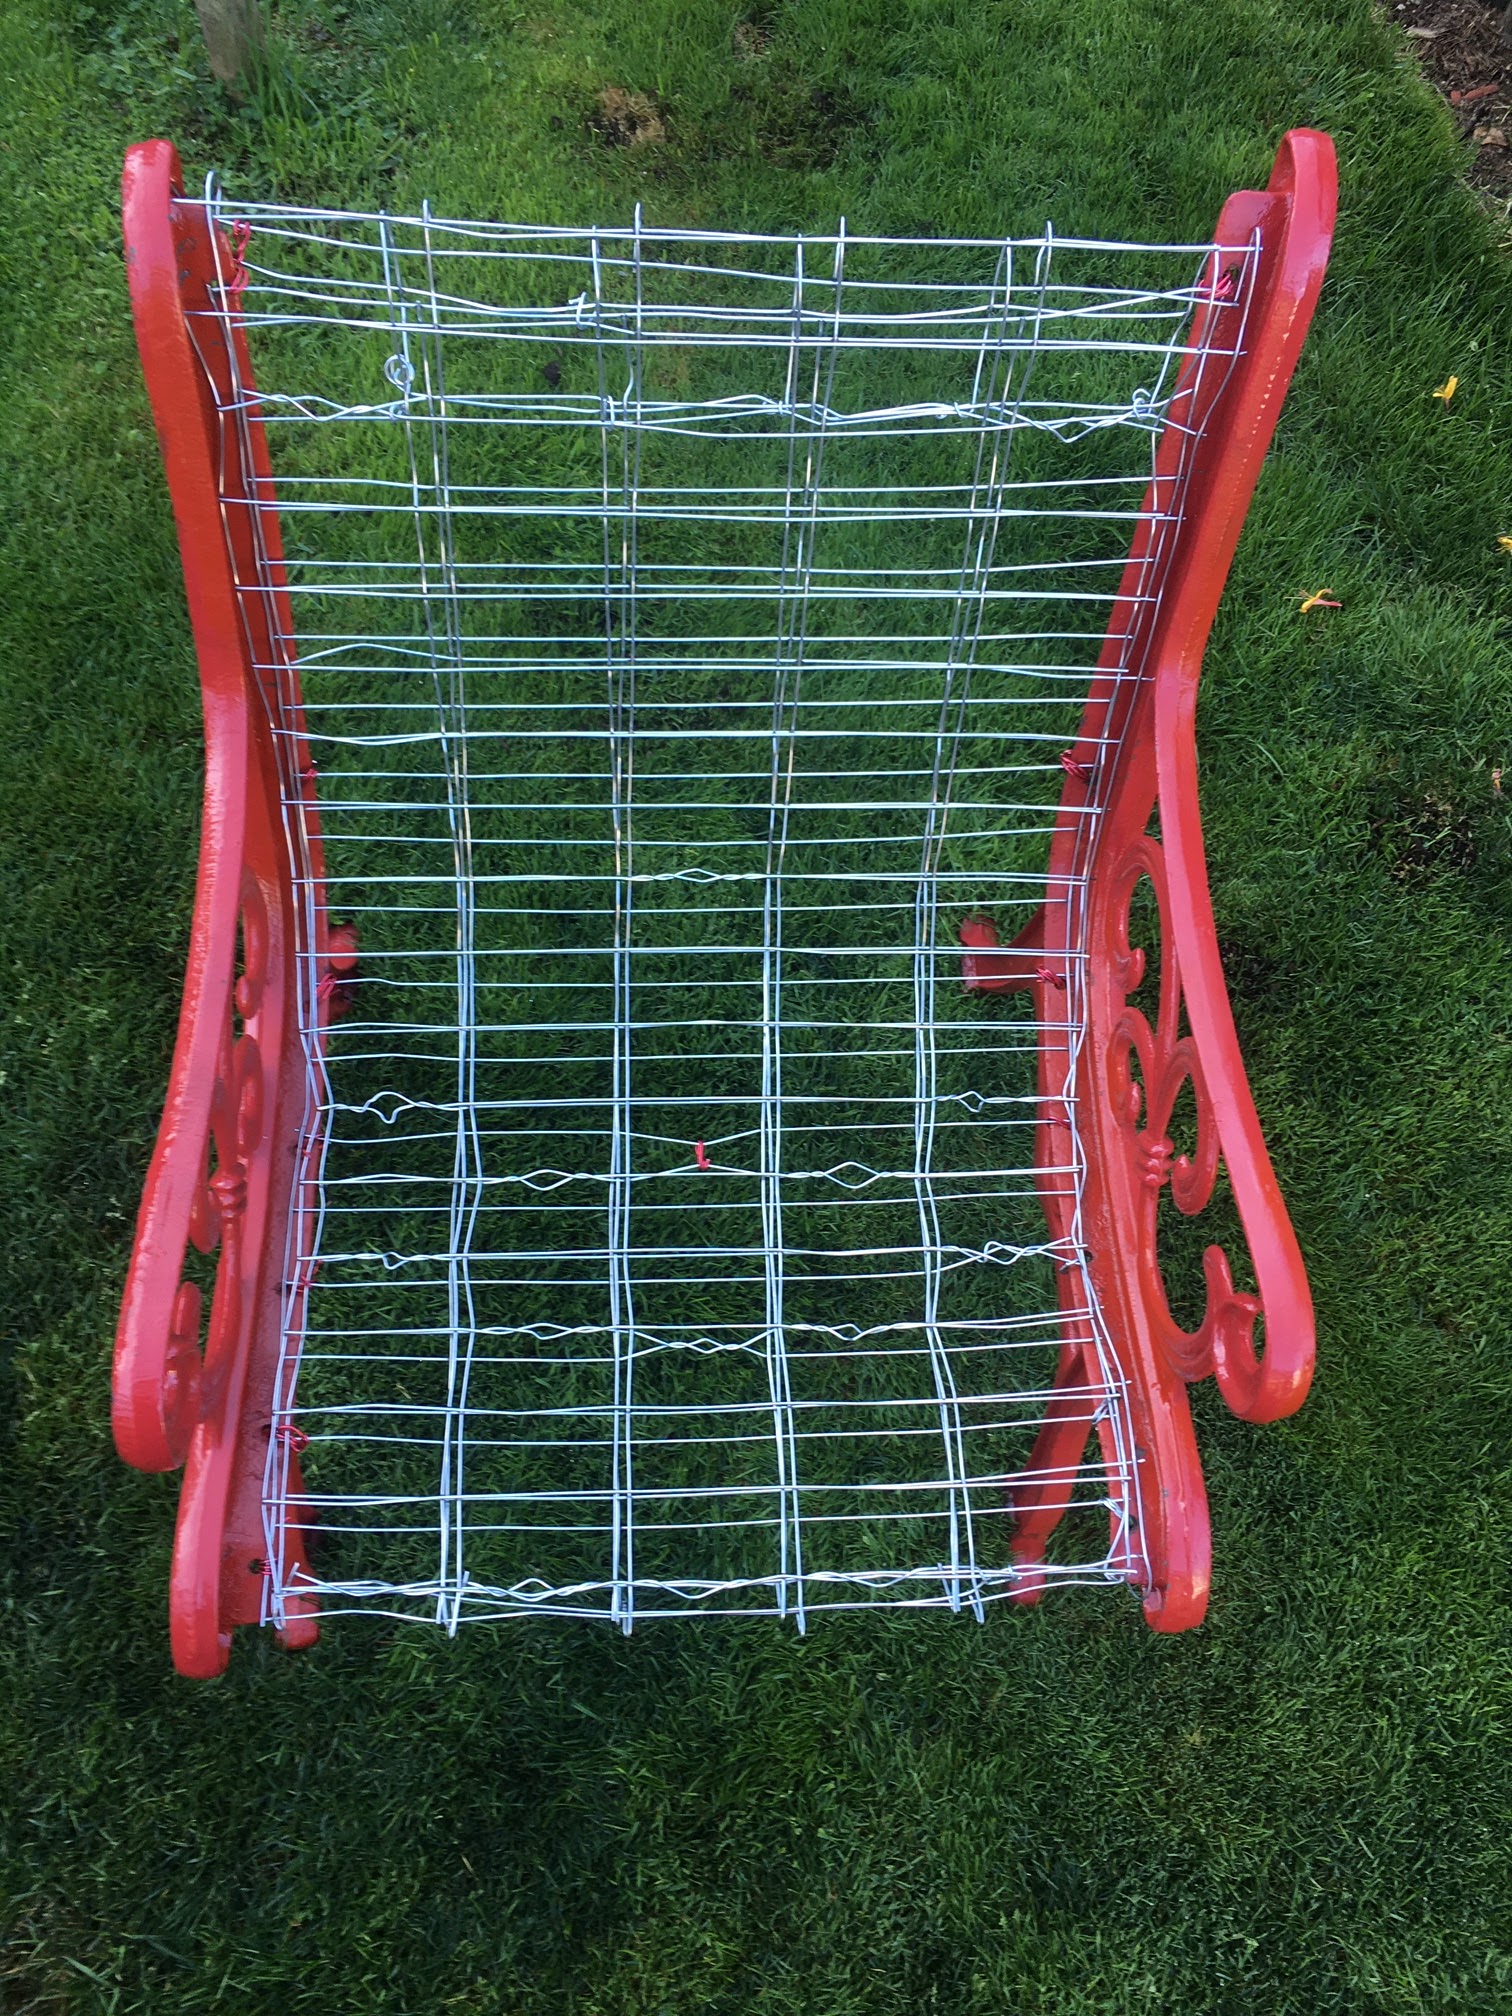
I just happen to be doing a lot of fencing around my place so had some extra wire laying around. That's what I used to build the frame for the seat and back.


I applied three layers of wire, individually. Securing the first layer to the iron side-arms. Then adding the second and third layers of wire, twisting each layer of wire together to make a seat and back as shown.

In truth, the chair is comfortable with just the wire. It feels like a typical lawn chair to sit in. Yet I wanted something more luxurious.


So sheep-skin it is!


Wednesday, August 12, 2020

When craft projects FLOP!

How to make a peg-board (when your antique-looking mirror project fails)


The mother of invention is at it again!


Cheap ways to decorate your walls


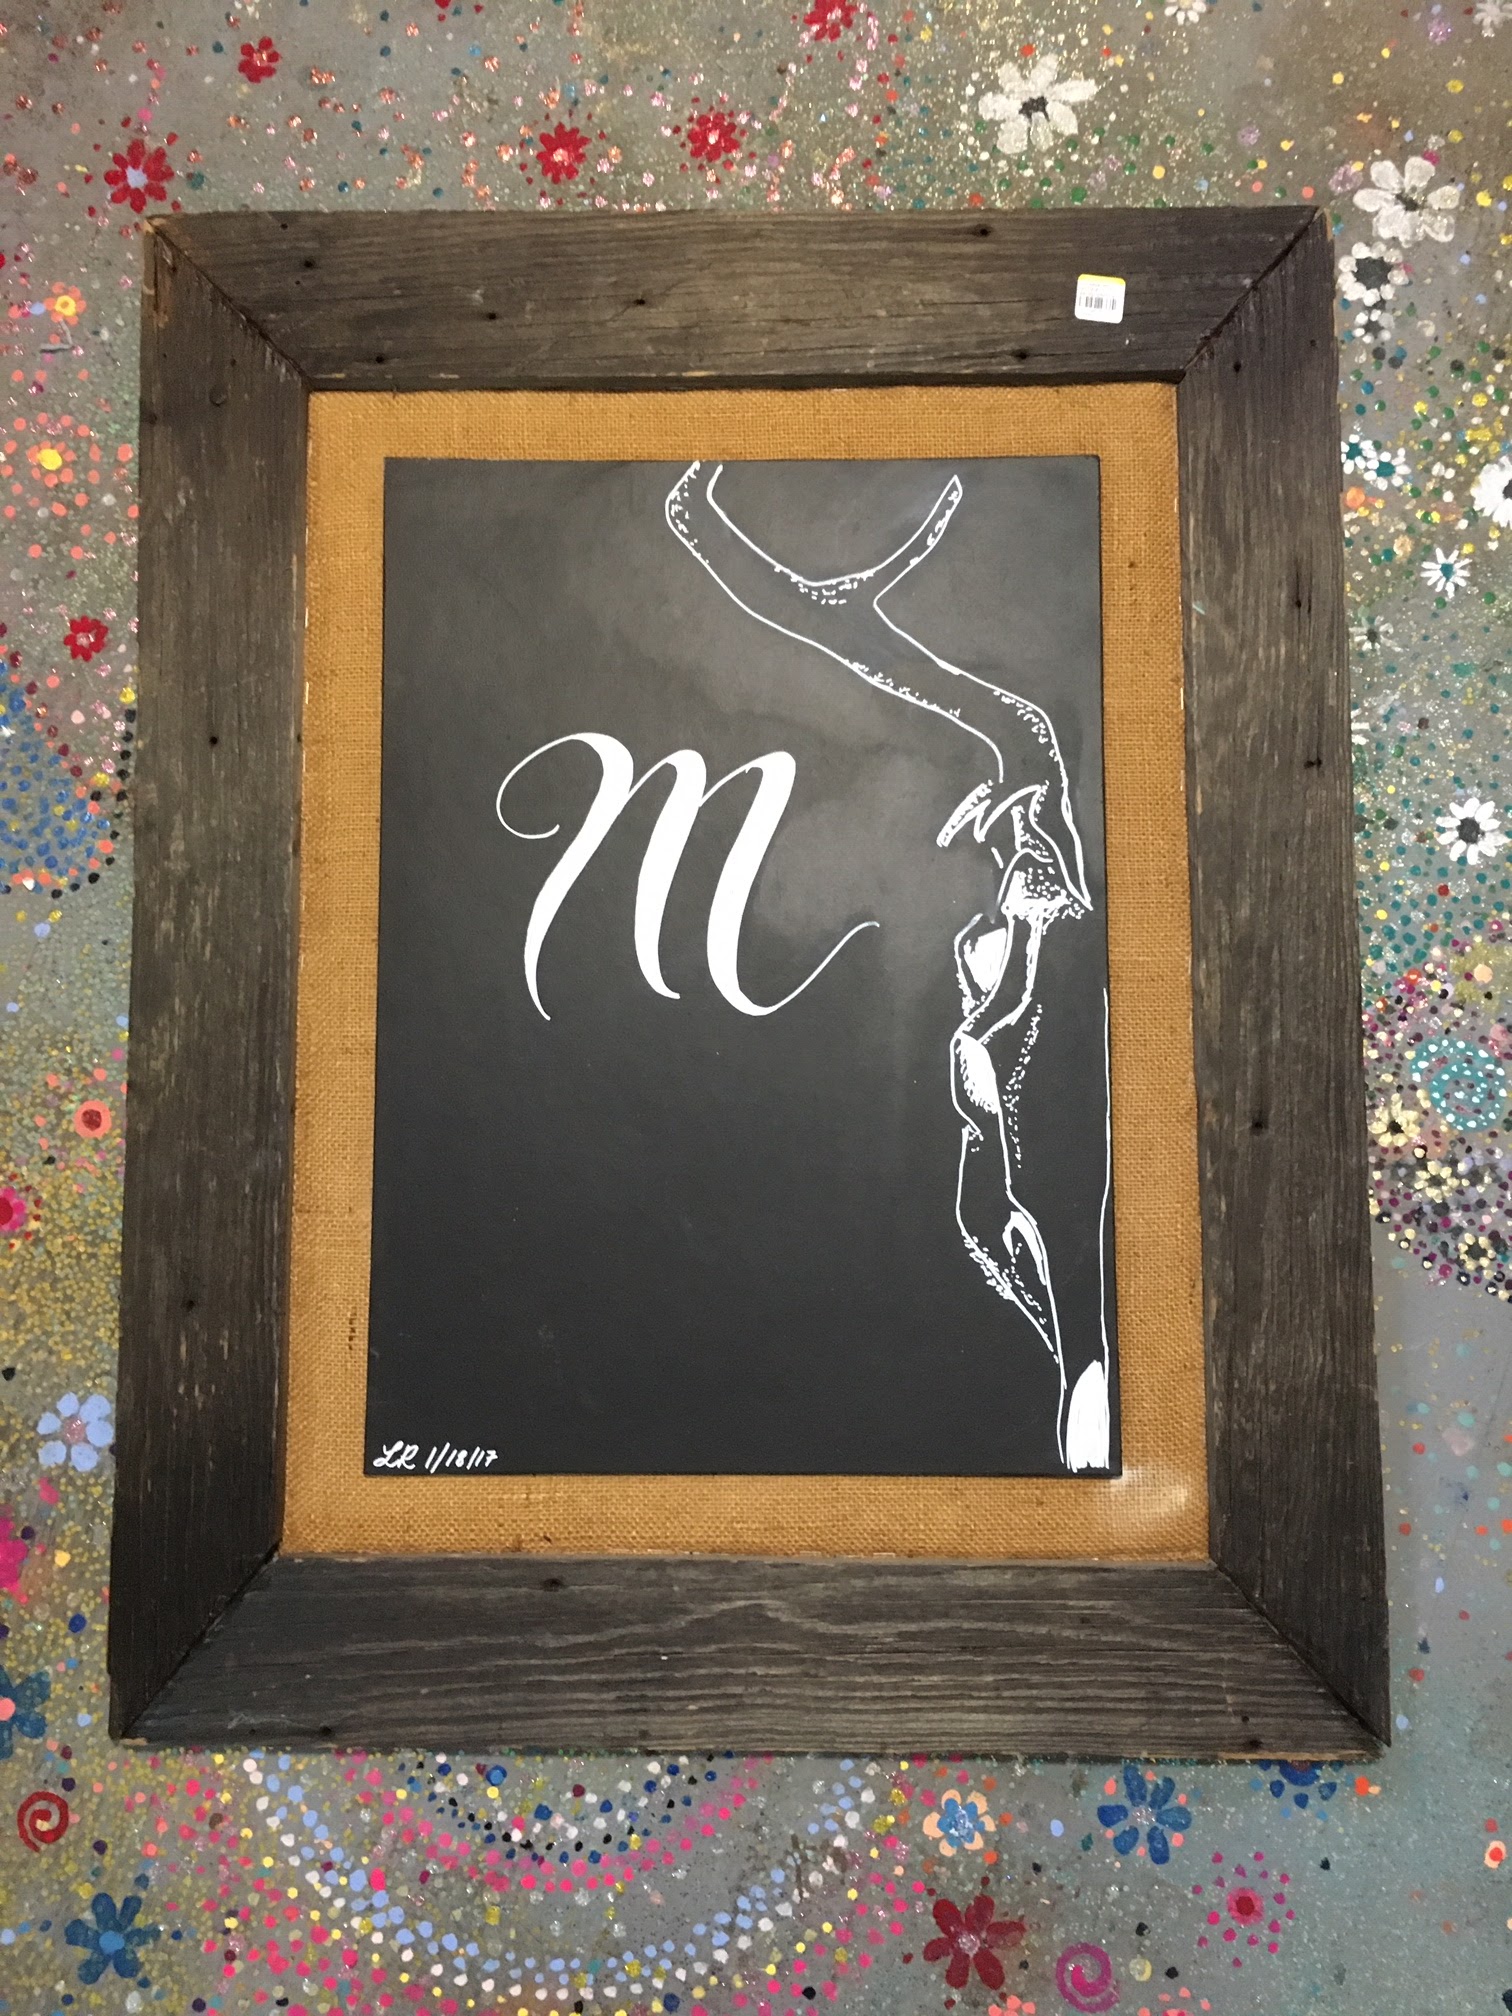
I had great plans for this large shabby-looking wooden frame, with its terribly ugly drawing that someone had hand painted (and then donated to Goodwill). 

I will be removing the above drawing from its ugly burlap backing and will paint over both the burlap and the artwork.


My vision was to use this Krylon "Looking Glass" can of spray paint to "cover the sin" in the existing drawing (with black background). I paid roughly $12 for this spray can and could not WAIT to see what this paint could do.


"Looking Glass" my eye!  I was hoping the dried paint would be somewhat reflective and look like an old antique mirror. My goal was to turn this matte board into some kind of cool emotion.


I sprayed the board lightly OVER and OVER. The $12 paint kept spurting out in blobs and looked really blotchy. I'd have been better off using an ordinary $4 can of grey paint. At least then the finish would have been smooth and solid in color! *BLEH!* (NOTE: I may try this paint on a smooth surface to see if it works better at making a reflection)


Krylon Glitter Shimmer spray paint
Every faerie knows that glitter makes every failed art project look better! It's "Glitter Shimmer" (glistening gold) paint to the rescue!

Can you say "magick is afloat?" 

I'll be spraying this over the grey-botched job.


Normally, to make a peg board, you'd insert a back-drop that looks something like this: 


Typical Peg Board


I didn't have any peg board on hand, though, so I'm going to use the grey-covered in gold sparkles (messed up art) in lieu of that peg board. 


Painted burlap backing adds a great texture to this work.


I also brush-painted over the burlap background with extra grey house paint that was sitting around just shouting, "use me, paint with ME-e-e-e-e!." 


Temporary result. I'm not exactly loving this.


The beauty of doing any kind of crafts is you can always switch, paint, and re-do your art. We all need room to make mistakes when craft projects are the game.


Thursday, August 6, 2020

How To Make A Faerie Garden (Fairy Garden)

Crone Crafts by the Mother of Invention


How to create a magical faerie land for your yard

fairy garden
The succulent plants in my back-yard faerie garden (fairy garden) have reproduced and spread so much. After giving away a lot of the plants, I decided to build a NEW faerie garden in my front yard. Here's how I did it.

The first order of business is to determine what shape you want your garden to be. I had an old mini-trampoline that I disassembled for craft parts (later you will see what I make out of the springs and such).


Today, I'm starting with the mini-tramp's frame. I plan to use this metal circle to outline the round shape of my faerie garden. 


To keep the lawn from growing up through my faerie garden, I laid down cardboard

I added hollow red cube bricks that I gleaned for FREE off Craigslist. These will support the soil and plants. (They will also discourage my dogs from digging up the plants and frame the garden loam.)

As you can see, I filled the red bricks with loam, added some plants, and installed gravel to create a path to the faerie's home. Gravel can also serve as a  driveway/walkway or other faerie path.


To build a faerie fence (fairy fence) I strung together tongue depressers. I purchased these from the Dollar Tree and strung them together with fencing wire before painting them.  

Also from the Dollar Tree, I purchased tiny pallets that I glued together to make faerie structures (fairy buildings). 

I painted all my faerie houses red and would later add moss for the roofing.


As you can see, I added a treasure chest and some landscape stones.
No Faerie garden is complete without a clothes line. I crocheted small faerie clothes, a faerie garden hat, and faerie boots. The clothes pins were purchased at the Dollar Tree (for $1).

As you can see, the plants have room to grow. In time this Faerie garden will mature and change shape as the plants decide to change the landscape. 


No faerie garden is complete without a giant watch dog who makes the garden fey feel safe. <3


NOTE: Faeries come in all sizes. Some can also shape-shift to take on larger than human form.  In Hollywood the fae are described as tiny magical people and elves or monsters with wings.  "Fae" is the plural of faerie. Many believe that the Fae are mischievous tricksters. Yet I believe Fae are just as diverse as people. Some you may want to invite into your home and some you would never want around lest they steal your trinkets, keys, and generally create mayhem in your home.

The word usage difference in regards to whether you spell fairy or faerie is personal. Some sources claim that "fairy" regards the mythical creature (as depicted by Hollywood). Those who nurture a relationship with woodland and garden fae are more likely to spell it "faerie."

KEY WORDS: Fairy garden, Faerie garden, Fairy land, Faerie land, Fae garden, garden for fairies. Build your own fairy yard.


Monday, July 27, 2020

Paint a Venus of Willendorf statue!

Want to make art to gain control over your environment? This project can easily be used for magick and ritual or just as a yard ornament to draw abundance into your yard and home.


The Goddess of Abundance: Venus of Willendorf


The original Venus of Willendorf was carved roughly 25,000 years ago from Oolitic limestone. 4½ inches high, She got her name Venus because Palaeolithic female figurines are collectively described as "Venus figurines." (Venus is the Roman Goddess of beauty but some have used the name "Venus" in a derogatory way to reduce women to sexual objects only).


The statue's last name comes from where she was unearthed, on the banks of the Danube River, in Willendorf, Austria. It is widely believed that she is both a fertility Goddess and a good luck totem for abundance. Her headpiece seems to be made out of grain or corn and her extra body weight shows that she is very well fed; even during a time when people often had very little to eat.

Some would argue the fact that since the Venus of Willendorf is not given a defined face - she is depersonalized but I personally believe this elevates her. The Gods cannot be limited to one facial structure or another, after all. They are shape-shifters. They can hear without ears and speak telepathically. (Anyone who has done meditation work and seen visions knows this, intimately.)

To create my own statue in honor of the Venus of Villendorf, I purchased this concrete "river rock" edging from Home Depot but you can find it online via Home Depot or eBay  

The first thing I did, was to paint her red with a high gloss spray can.
Then,
I used a gold painter's pen to draw on the shadows and went over it with a permanent marker. May this Goddess draw abundance and happiness to my yard (and may your creation also bless you!).

Sunday, July 26, 2020

Create Faerie Welcome Signs For Your Garden


I will be adding to this post as more signs are created. Yet here's the first one for a start.

Crone Crafts by the Mother of Invention


I used a circular saw to make the wooden sign and just painted away! For garden signs you either need to use an exterior paint (found at Hardware stores) or use a high gloss enamel... fingernail polish will do as wekk!

Hoping these creative signs in my garden ... one of a kind work ... will energetically attract Garden Faeries who wish to bless my gardens.
MORE SIGNS TO COME!

Tuesday, July 21, 2020

Create a Faerie Altar!

Garden altars add magick to your yard.


Crone Crafts by the Mother of Invention


Faerie altars are a lot of fun to create. You first need an empty container and I found this square one at a local thrift store.


Drill drainage holes in the bottom of your container and then fill it with a quality potting soil. Then begin adding your collection of stones, marbles, shells, and mosses.


Here's the top view of mine. For the bamboo fence, I simply cut a section out of an old placemat. There is no wrong way to layout your Faerie garden. Just begin designing your Faerie garden on top of the potting soil. Relax as you play with the layout, using the supplies that you gathered, and enjoy the process of "feeling" your way through the design.


To make the clothesline, I simply stuck two small sticks into the potting soil and tied a short piece of rope between them, tied either end of the rope off at the tops of alternating sticks. Then added  little pieces of fabric that I had cut to resemble clothes, pillowcases, and socks and I glued them to the clothesline rope. Later I would order tiny clothespins from eBay but I have since found packages of miniature clothespins at the local Dollar Tree. 


Here's another, much more mature, faerie garden. I probably need to trim this one as it is more than a little overgrown now.


Friday, July 17, 2020

Create a plantar from a pallet! (UPDATED 7/24/2020)


Crone Crafts by the Mother of Invention


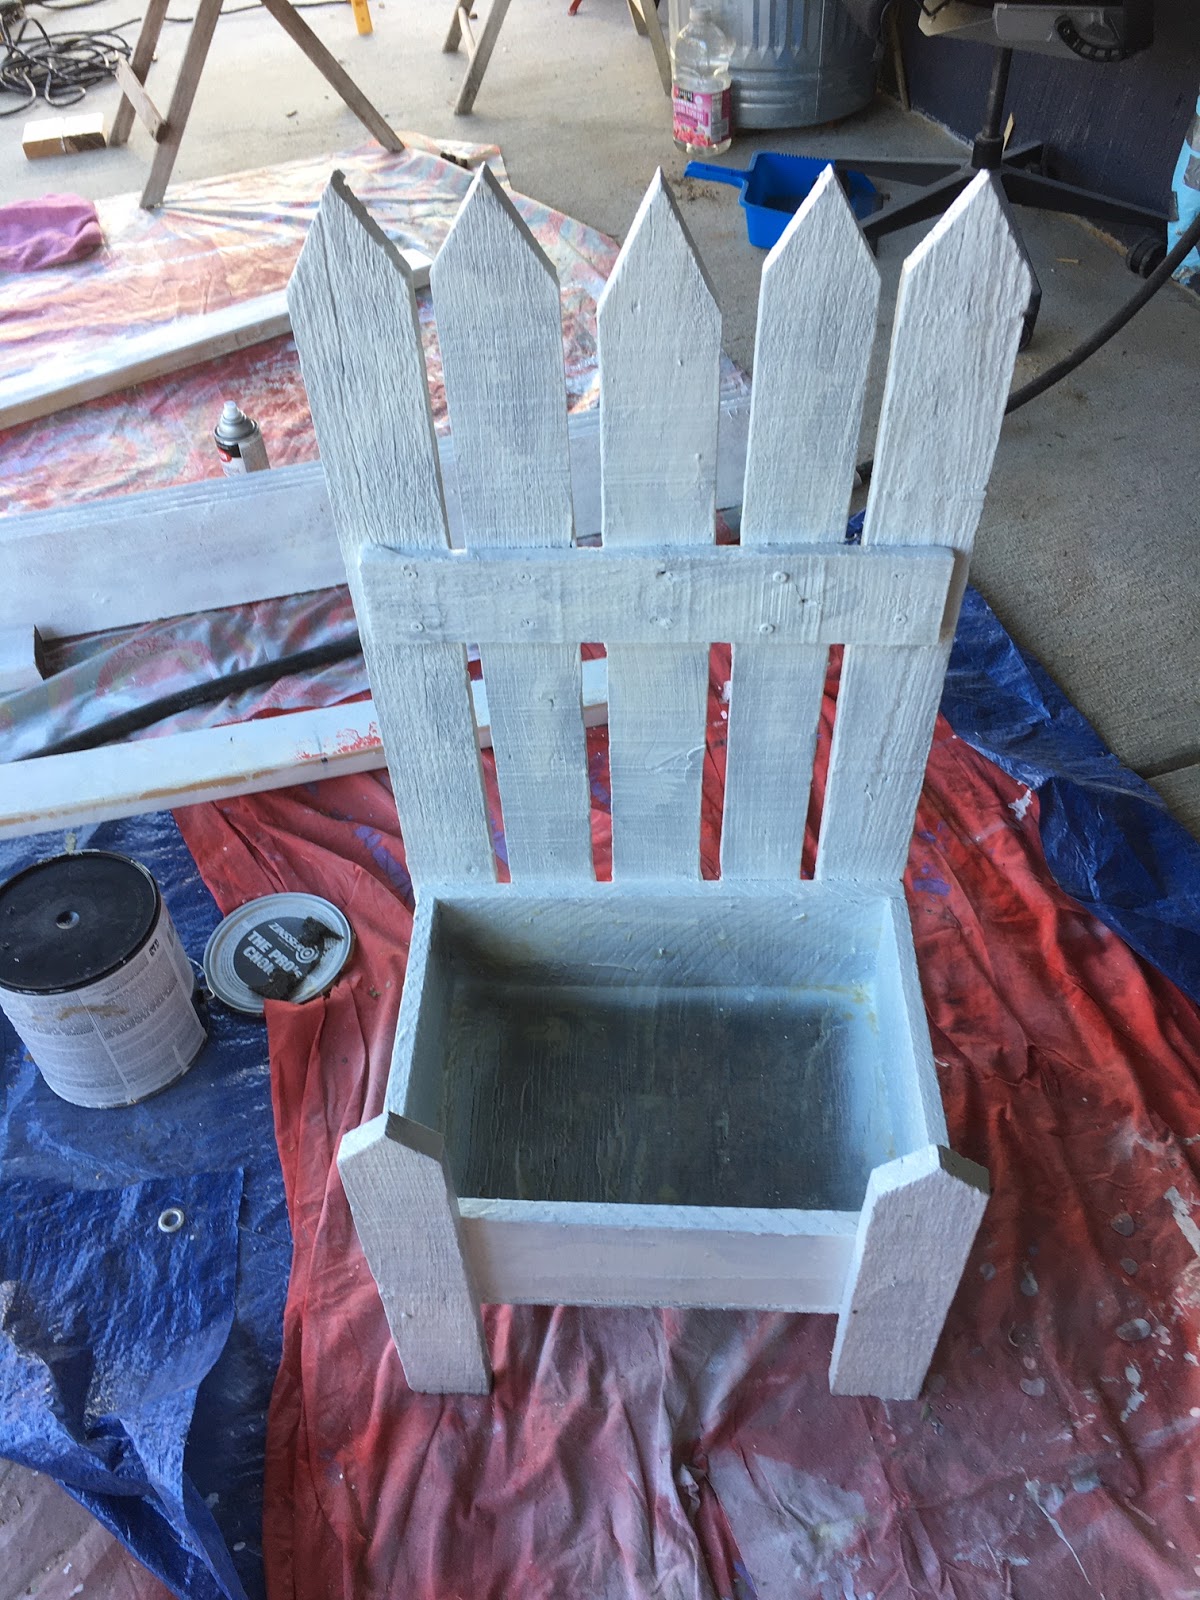
I am currently in the process of creating a picket fence out of pallets. It's a big project and has been capitalizing on most of my time here lately. For this blog post, (since not everybody has a whole yard that they need to build a large fence for) I'm showing a couple of easy-to-build wooden planters from pallets. These would fit easily on someone's patio or deck.


Supplies for building a planter out of a pallet


All you need, really, is  1) a circular saw, 2) a hammer, 3) nails (either salvage the pallet nails or buy some) and 4) paint to decorate your plantar. There are plenty of "how to build a picket fence out of pallets" videos on YouTube. I don't want to reinvent the wheel here. So watch a couple of those videos and then disassemble and reassemble your pallets however you like.


EXAMPLE #1 - The easiest pallet planter ever!


For this first planter, I just simply stood the pallet on its side, removed a couple of boards, and then shortened one board to fit into the bottom of the first rung (to create the planter)

Here is that exact same planter painted black, with lettering and beading. 


EXAMPLE #2 - This next pallet planter takes a bit more time to build!


I will finish painting this more complex planter later and will blog about it then. Look for photos to come! (Did I mention I'm building a picket fence for my entire yard at the moment?) ...I will be thinking about how to make this into a mini altar for the Faeries. Until then, you can see the basic design for now.

UPDATE 7/24/20: And here she is!


Finished plantar made from a pallet


Monday, June 29, 2020

Add Magickal Protection To Your Coronavirus Mask!

Focus On The Physical Realm First


People often ask me "how can I protect myself magickally?" My first response is to protect yourself PHYSICALLY first. During the Coronavirus pandemic, wear a mask. Keep your social Distance. Keep yourself physically safe. Yet there are also many magickal things you can do to protect yourself from Covid-19. There are many different ways to approach spell work and a medical face mask presents a cool NEW opportunity to work protective magick!


Draw a protective symbol on the Underside of Your Mask!


You can draw a protection symbol on your medical mask

Nobody needs to know what sort of magick you are working to protect yourself if you put the symbol on the inside of your mask.

Create a Magickal Protection Box for Holding Your Covid-19 Protection Masks


Use an empty cigar box to hold your Covid-19 mask
The need to wear a protective face mask presented a new issue for me. I kept putting my new cloth masks in my sock drawer and every time I'd need to go somewhere I'd be wasting time hunting for it through the drawer. 
Finally, I decided to create a box that is unique for holding my masks, and I just happened to have an old cigar box that I had painted purple, once upon a time.

(I will now paint the inside of the box to make it more magickal.) 


Because the Covid-19 masks are for our protection, I drew one of the most common protective symbols on the lid of my facemask box. The five-pointed pentacle! For your box, you can use any protective symbol that you feel an affinity for. Focus your intention for protection as you paint your box.

You can also STORE YOUR MASKs with protective stones, and ask the stones to imbue warrior-protection to your mask.

I am a gardener so I store my masks with protective herbs like fresh rosemary or bay leaves. Doing that gives the mask a very pleasant aroma while I wear it (which is quite pleasant). If you store your mask with a dried herb, make sure the plant you select is nonpoisonous and that it won't irritate your skin.


Here are just a few protection symbols that you MIGHT use to draw on the back of your mask or on your mask storage box. 


  • Pentacle
  • Solar symbol
  • Mars symbol
  • Bind Runes
  • Eye of Horus
  • Triquetra
  • Helm of Awe


  • REMEMBER BEFORE DOING ANY MAGICK:

    FIRST: Take care of your emotional and physical self 

    When working any kind of spellcraft, it's important to be in a good frame of mind. 


    Rent a boat or take a walk in the woods (do something in nature)
    for your mental/emotional health
    • Do some other kind of exercise (bike, walk, dig a hole to plant a tree).
    • Eat healthy whole foods 
    • Take care of your emotional health by checking up with friends/family and doing things that feed your soul; socially.
    • EXAMPLES OF THINGS THAT MIGHT FEED YOUR SOUL:
      • start a garden
      • grow backyard chickens
      • adopt a dog
      • rent a boat
      • give yourself permission to read for pleasure!
      • take a walk in the woods
      • go for a swim
      • sunbathe (if that feels healthy for you)
      • fly a kite, ride a motorcycle, go horseback riding 
      • call your grandparents and be social with shut-ins
      • blog!


      • Every good witch knows that taking care of the physical and emotional realm is always the first order of attack for anyone who does root magick, stone magick, is a kitchen witch, or who does any other kind of spell work with symbols, Tarot cards, and/or stones.

        Many blessings to you. May you feel utterly safe and well.


    Saturday, June 20, 2020

    How To Turn a Printed T-shirt Into One-Of-A-Kind Home Art

    How to transform a T-Shirt into Kitchen Art!

    From this T-shirt


    Into This Kitchen Art


    Crone Crafts by the Mother of Invention


    I love thrift-store shopping. 


    My grandmother Dorothy loved second-hand stores too and she'd say to me "let's go ragging!" So as a young teen, I'd push her wheelchair to the local thrift store and we'd shop for treasures together. I have so many memories of shopping rag stores with her and I still treasure all of the fun expressions she'd make over the odd things we'd found.

    There's so much magick that happens inside of thrift stores - magick that's just waiting for your witchy transformation to turn those used goods into works of art! (Protect our planet from the people-virus. Repurpose and reuse!)

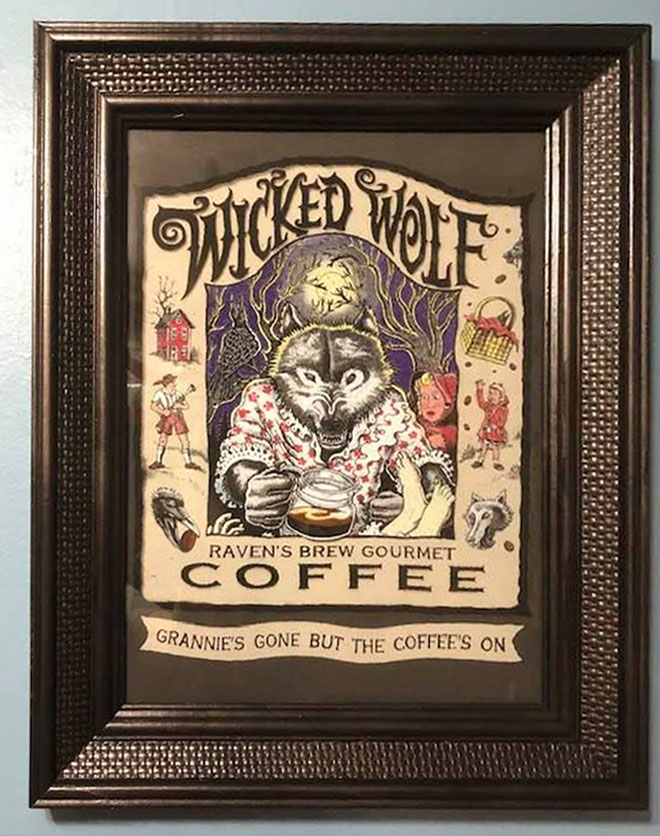
    Imagine my glee today when I found this wonderful X-tra large T-shirt for $7.99. It was way too big for me and definitely not the v-neck style of shirt that I'd be willing to wear. Yet I loved the logo so much, I thought I might transform it into a picture to hang in my kitchen!


    "Wicked Wolf Coffee! Grannies gone but the coffee's on!"


    To make this T-shirt become a work of home art, I needed the perfect sized picture frame for it and fortunately, I found one at the same store where I found the shirt!


    I paid $12.99 for this rather large used frame. It seems unimpressive at first glance. On the back of the frame, someone had written the names of these children (pictured) and they were designated as someone's grandchildren. Are you noticing the grandma vibe that's going on here in this entire post? 

    With three grandchildren of my own now - I'm really celebrating the whole grannie lifestyle! Bring on the crone!


    Isn't it lovely how transformative a couple layers of paint can be? In its original state, the natural wood frame wouldn't match my house. So I decided to paint it black. 

    I removed the old photo, washed the glass, and isolated the wood for painting. 

    You wouldn't even know this was the same wood frame! The painted version looks so much richer in all black!


    While the black paint was drying on the frame, I cut the T-shirt out into a rough rectangle to the size of the cardboard backing. 

    Then I added a very light amount of glue to the cardboard and
    glued the T-shirt's logo onto the cardboard. (NOTE: *Do not use too much glue when you do this or you might stain your shirt's fabric!*)


    Once both the glue and the paint were dry - I reassembled the frame with the T-shirt logo and fastened all the nails on back and finished it out with a hanging wire.


    Kitchen art from a T-shirt logo

    Now I have this awesome T-shirt logo in a large picture frame, hanging in my kitchen.

    The total price for this work of art was $21 
    and it is one-of-a-kind. I seriously doubt anyone else has anything that looks much like this in THEIR kitchen! (Don't joke about it. I love it.)

    That's what really matters. Isn't it? Your home should reflect the things that YOU collected and love. Happy thrift-store shopping! Or should I say, "Let's go ragging!"

    Thursday, June 18, 2020

    How To Make A Hanging Chicken Water Bowl

    Crone Crafts by the Mother of Invention


    I've got a new brood of chicks and that means I'm reassessing my chicken coop. Not only did I tear down the old Chicken house to build a new one, but I'm remembering all the water bowl cleaning I dealt with in times past as chickens scratch and claw the ground, kicking dirt into their water bowls.

    So this brood will get a HANGING water bowl (to hopefully keep the water cleaner).


    Found this rather large old cast iron Christmas ball at the Goodwill Pick-A-Part for $2. (Lights didn't work.)


    Removed the lights with a wire-cutter and that revealed the lovely cast iron frame.


    I hung the cast iron ball inside my chicken coop with wire I bought from the Dollar Tree. $3 into this project so far (and I have leftover wire)!

    Found a large metal bowl at a local thrift store for $2. Turning the metal bowl sideways, I was able to squeeze it in between the cast iron rungs. Total cost for my hanging chicken water bowl: $5.